Products, Uncategorized, What's New !
Everything You Need to Know About Resin Art: A Comprehensive Guide

Jan

1. Introduction
Resin art has gained significant popularity in recent years, captivating artists and enthusiasts with its unique and versatile properties. Whether you are a seasoned artist or a beginner looking to explore new artistic avenues, understanding the essentials of resin art is crucial to achieve stunning results. This comprehensive guide will provide you with everything you need to know about resin art, from the materials and equipment required to the techniques and tips for creating awe-inspiring resin masterpieces. So, get ready to dive into the fascinating world of resin art and unleash your creativity like never before!
2. What is resin art?
Resin art is a form of art that involves using a two-part epoxy resin as a medium to create stunning and unique artworks. The resin is a clear, viscous liquid that, when mixed with a hardener, undergoes a chemical reaction that results in a durable and glossy finish.
One of the most distinctive features of resin art is its ability to create beautiful three-dimensional effects and a glass-like finish. The fluidity of the resin allows artists to achieve mesmerizing swirls, waves, and gradients, making each piece one-of-a-kind.
Resin art can be applied to various surfaces, including canvas, wood, metal, and even furniture. It offers endless possibilities for creativity, allowing artists to experiment with colors, textures, and techniques. With its ability to encapsulate objects and create a sense of depth, resin art opens up a world of artistic possibilities.
In the next section, we will delve into the materials and equipment necessary to start your resin art journey. Stay tuned!
3. Materials and equipment needed for resin art
Resin art requires specific materials and equipment to ensure successful and safe artwork creation. Here are the essential items you will need to get started: Epoxy resin: Look for high-quality, artist-grade epoxy resin that is specifically formulated for art purposes. It should be non-toxic and have a low odor.
- Hardener: The resin will require a hardener or catalyst to initiate the chemical reaction. Always use the recommended hardener that matches the epoxy resin you have chosen.
- Pigments and colorants: Add some color to your resin art with pigments or liquid colorants. Acrylic paints, alcohol inks, and mica powders are popular choices for achieving vibrant and rich colors.
- Mixing cups and stirring tools: Use clear plastic or silicone measuring cups and stir sticks for accurate measurements and thorough mixing.
- Protective gear: Protect yourself by wearing nitrile gloves, safety goggles, and a respiratory mask to avoid direct contact with the resin and its fumes.
- Heat gun or torch: A heat gun or torch is necessary to remove air bubbles from the resin and create stunning effects.
Ensure you have these materials and equipment ready before you begin your resin art journey. In the following section, we will discuss the preparation and safety measures you should consider. Stay tuned!
4. Preparing your workspace for resin art
Preparing your workspace is crucial for a successful and enjoyable resin art experience. Here are some important steps to take:
- Choose a well-ventilated area: Resin emits fumes that can be harmful if inhaled. Ensure that you have good airflow in your workspace by opening windows or using fans.
- Protect your work surface: Place a protective covering on your work surface to prevent any resin spills or stains. Plastic sheeting or a silicone mat works well for this purpose.
- Level your surface: Resin is self-leveling, meaning it will flow and settle evenly. However, to achieve the best results, make sure your workspace is level. Use a spirit level to check and adjust if necessary.
- Organize your materials: Keep all your resin art supplies within easy reach. This includes your epoxy resin, hardener, pigments, measuring cups, and stirring tools. Having everything organized will make the process more efficient.
Taking the time to prepare your workspace will provide a clean and safe environment for working with resin. In the next section, we will discuss the step-by-step process of mixing and pouring resin. Stay tuned to learn more!
5. Step-by-step guide to creating resin art
Now that your workspace is set up and ready, it’s time to dive into the exciting process of creating resin art. Here is a step-by-step guide to help you along the way:
Step 1: Measure and mix your resin
Start by carefully measuring the required amount of epoxy resin and hardener according to the manufacturer’s instructions. It’s crucial to be precise with your measurements to achieve the desired outcome. Use separate measuring cups for resin and hardener to avoid contamination.
Step 2: Stir the mixture
Once you have measured the resin and hardener, gently pour them into a clean mixing cup. Using a stirring stick, slowly stir the mixture in a figure-eight motion for about two minutes. Be careful not to introduce any air bubbles into the mixture.
Step 3: Add pigments
If you want to add color to your resin art, now is the time to mix in pigments or dyes. Start with a little bit and gradually add more until you achieve your desired hue. Stir gently to ensure an even distribution of color.
Step 4: Pour the resin
With your mixture prepared, it’s time to pour it onto your chosen surface. Start by pouring a small amount in one spot and let it spread naturally. Use a heat gun or a blowtorch to eliminate any remaining air bubbles. As you pour more resin, you can create layers and add additional elements like dried flowers or glitters to enhance your artwork.
Step 5: Finishing touches
Allow your resin artwork to cure according to the manufacturer’s instructions. Once it is fully cured, you can remove any protective covering and trim any excess edges. Your masterpiece is now complete and ready to be displayed!
Creating resin art is an immersive and creative experience that allows you to express your artistic vision. Stay tuned for our next section, where we will explore different techniques and effects you can achieve with resin. Get ready to take your resin art to the next level!
6. Tips and techniques for achieving different effects in resin art
Tips and techniques for achieving different effects in resin art
Now that you have mastered the basics of resin art, it’s time to explore the endless possibilities and creativity that resin brings. Here are some tips and techniques to help you achieve different effects and take your resin art to the next level:
- Creating depth and dimension: Experiment with layering different colors of resin to create a sense of depth in your artwork. Pour one layer, let it partially cure, and then pour another layer on top. You can also add elements like glitter, metallic powders, or crushed glass to enhance the three-dimensional effect.
- Swirling and marbling: To create marbled or swirled patterns, pour different colors of resin into one cup and gently swirl them together using a stirring stick. Be careful not to overmix, as it can result in a muddy color. Pour the mixed resin onto your surface and watch the beautiful patterns unfold.
- Resin casting: Resin casting involves embedding objects within resin to create unique and eye-catching pieces. You can use molds to create shapes like coasters, jewelry, or paperweights. Experiment with different materials like dried flowers, shells, or small trinkets to create one-of-a-kind resin castings.
- Alcohol ink techniques: Mix alcohol ink with resin to create stunning abstract effects. Drop alcohol ink onto the resin surface and watch it spread and blend organically. Use a straw or a heat gun to create movement and unique patterns.
- Finishing touches: Once your resin art is cured, you can add final touches to enhance its beauty. Use sandpaper or a rotary tool to smooth any rough edges. Apply a clear resin epoxy coat to give your artwork a glossy and professional finish.
Remember, resin art is all about experimentation and embracing the unexpected. Don’t be afraid to try new techniques, combine different materials, and let your creativity run wild. Stay tuned for our next blog section, where we will dive deeper into troubleshooting common issues in resin art.
7. Curing and finishing resin art pieces
After putting in the time and effort to create your resin art masterpiece, it’s important to ensure that it is properly cured and finished for long-lasting beauty and durability. Here are some essential steps to follow:
- Allow for proper curing time: Resin typically takes anywhere from 24 to 72 hours to fully cure, depending on the brand and the temperature and humidity of your environment. Follow the manufacturer’s instructions for the recommended curing time and avoid touching or moving your artwork until it is completely cured.
- Remove any imperfections: Once your resin art is cured, inspect it for any imperfections such as air bubbles or dust particles. If you notice any, you can easily fix them with a heat gun or a small butane torch. Gently pass the flame over the surface, being careful not to burn or scorch the resin.
- Smooth and polish: If desired, you can further enhance the surface of your resin art by sanding and polishing it. Start with a low-grit sandpaper to remove any rough edges or uneven areas. Gradually work your way up to higher grits for a smoother finish. Finish off with a polishing compound to bring out the shine.
- Protect your artwork: Once your resin art is cured and finished, it’s important to protect it from UV light and moisture to prevent yellowing or damage. Apply a UV-resistant varnish or a clear protective coat designed for use with resin. Follow the manufacturer’s instructions for proper application and drying time.
Taking the time to properly cure and finish your resin art pieces will ensure that they look their best for years to come. In our next blog section, we will explore different ways to display and showcase your resin art, so stay tuned for more tips and inspiration!
8. Troubleshooting common issues in resin art
While creating resin art can be a fulfilling and enjoyable experience, it’s not uncommon to encounter some challenges along the way. Understanding how to troubleshoot common issues can help you overcome them and achieve the desired results. Here are some common problems you may encounter and their potential solutions:
- Bubbles: Air bubbles can sometimes form in the resin during the mixing or pouring process. To prevent bubbles, make sure to mix the resin thoroughly and pour it slowly. Use a heat gun or a small butane torch to remove any bubbles that do form. Alternatively, you can try using a resin with a longer working time to allow bubbles to escape naturally.
- Uneven curing: If your resin art doesn’t cure evenly, it may be due to an incorrect ratio of resin and hardener or inadequate mixing. Ensure that you are following the manufacturer’s instructions carefully and mix the components thoroughly. You may also want to consider using a silicone mold release or a demolding spray to prevent sticking, which can impact the curing process.
- Yellowing: Over time, resin art may start to yellow due to exposure to UV light. To minimize this, consider using a UV-resistant resin or apply a UV-resistant varnish or clear protective coat. Additionally, try to display your artwork away from direct sunlight or use UV-blocking glass if framing.
- Dust and debris: It’s frustrating when dust or debris ends up getting trapped in your resin art. To prevent this, make sure to work in a clean and dust-free environment. Cover your work area with a dust shield if necessary and use a dust-repellent spray on your artwork before pouring the resin.
Remember, troubleshooting is all part of the learning process, and with practice, you’ll become more skilled at creating flawless resin art pieces. In the next blog section, we will discuss some creative and unique resin art techniques that you can explore to take your artwork to the next level. Stay tuned for more inspiration!
9. Inspiration and ideas for resin art projects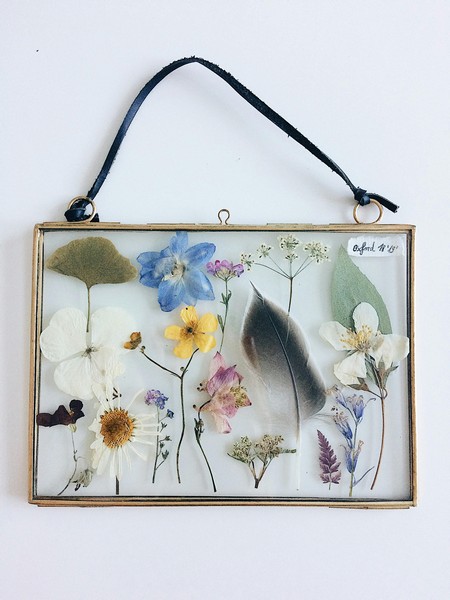
In addition to troubleshooting common resin art problems, exploring different techniques and ideas can provide endless inspiration for your artwork. When it comes to resin art, the possibilities are truly limitless.
One technique to consider is resin pouring. This involves pouring different colors of resin onto a canvas or another surface to create mesmerizing patterns and designs. Experiment with different pouring techniques such as the dirty pour, swipe, or flip cup to achieve unique effects.
Another popular technique is resin geode art. By creating the illusion of a geode with resin, you can add a touch of nature to your artwork. Use a combination of resin, pigments, and crystals to mimic the vibrant colors and sparkling crystals found in geodes.
If you’re feeling adventurous, try incorporating other materials into your resin art. You can embed dried flowers, sea shells, or even small trinkets to add depth and texture to your artwork.
By exploring these techniques and tapping into your creativity, you can create stunning resin art pieces that are truly one-of-a-kind. Stay tuned for the next section, where we will dive deeper into these techniques and provide step-by-step instructions to help you get started.
10. Safety precautions when working with resin
While resin art can be an exciting and creative endeavor, it is crucial to prioritize safety. Working with resin involves chemicals that can be hazardous if mishandled. By taking proper safety precautions, you can protect yourself and ensure a safe working environment.
First and foremost, always work in a well-ventilated area. Proper air circulation is essential to avoid inhaling the fumes emitted by the resin. Open windows or use an exhaust fan to help dissipate any lingering vapors.
Additionally, wear protective equipment such as gloves, goggles, and an apron to shield your skin from potential contact with the resin. This is particularly important when mixing and pouring the resin, as it can cause skin irritation or burns if it comes into direct contact.
It is also crucial to carefully read and follow the instructions provided by the manufacturer. Different resin brands may have specific guidelines regarding mixing ratios, curing times, and safety precautions. Always adhere to these instructions to ensure optimal results and minimize any risks associated with working with resin.
By prioritizing safety, you can fully enjoy the process of creating resin art while minimizing any potential hazards. In the next section, we will delve into the various tools and materials needed for resin art. Stay tuned for more insights!
11. Conclusion
In this comprehensive guide, we have covered the importance of prioritizing safety when working with resin art. By following proper safety precautions, such as working in a well-ventilated area, wearing protective equipment, and carefully reading and following manufacturer instructions, you can protect yourself from potential hazards and ensure a safe working environment.
Now that we have discussed safety, it’s time to dive into the exciting realm of tools and materials needed for resin art. In the upcoming section, we will explore the essential items you’ll need to create stunning resin artwork. From resin types and pigments to mixing tools and molds, we’ll provide you with a comprehensive list to help you get started on your resin art journey.
So stay tuned as we unravel the world of tools and materials that will enable you to unleash your creativity and bring your resin art visions to life.